Web Editor
Create, edit, and publish documentation directly in your browser with the Documentation.AI web editor
The web editor is a visual interface for creating, editing, and managing documentation directly in your browser. You do not need Git access or local tooling, so you can start writing from your dashboard immediately.
What the web editor is and when to use it
The web editor gives you:
-
A WYSIWYG experience for fast editing
-
Real-time collaboration with your team
-
Automatic saving and version-safe publishing
-
Easy access to Documentation.AI components through slash commands
Use the web editor when:
-
You want to write or update docs without touching Git or your local environment.
-
Multiple teammates (product, engineering, support) contribute to documentation.
-
You prefer a visual authoring experience with live preview.
-
You are iterating on content structure and layout directly in the browser.
If you need a Git-based workflow, local previews, or tight integration with your existing development tooling, use the code editor instead.
Unpublished changes are saved only in your current browser session. If you
switch browsers, devices, or clear your cache, these changes may be lost.
Changes published by other team members may not appear until your local
changes are published or cleared.
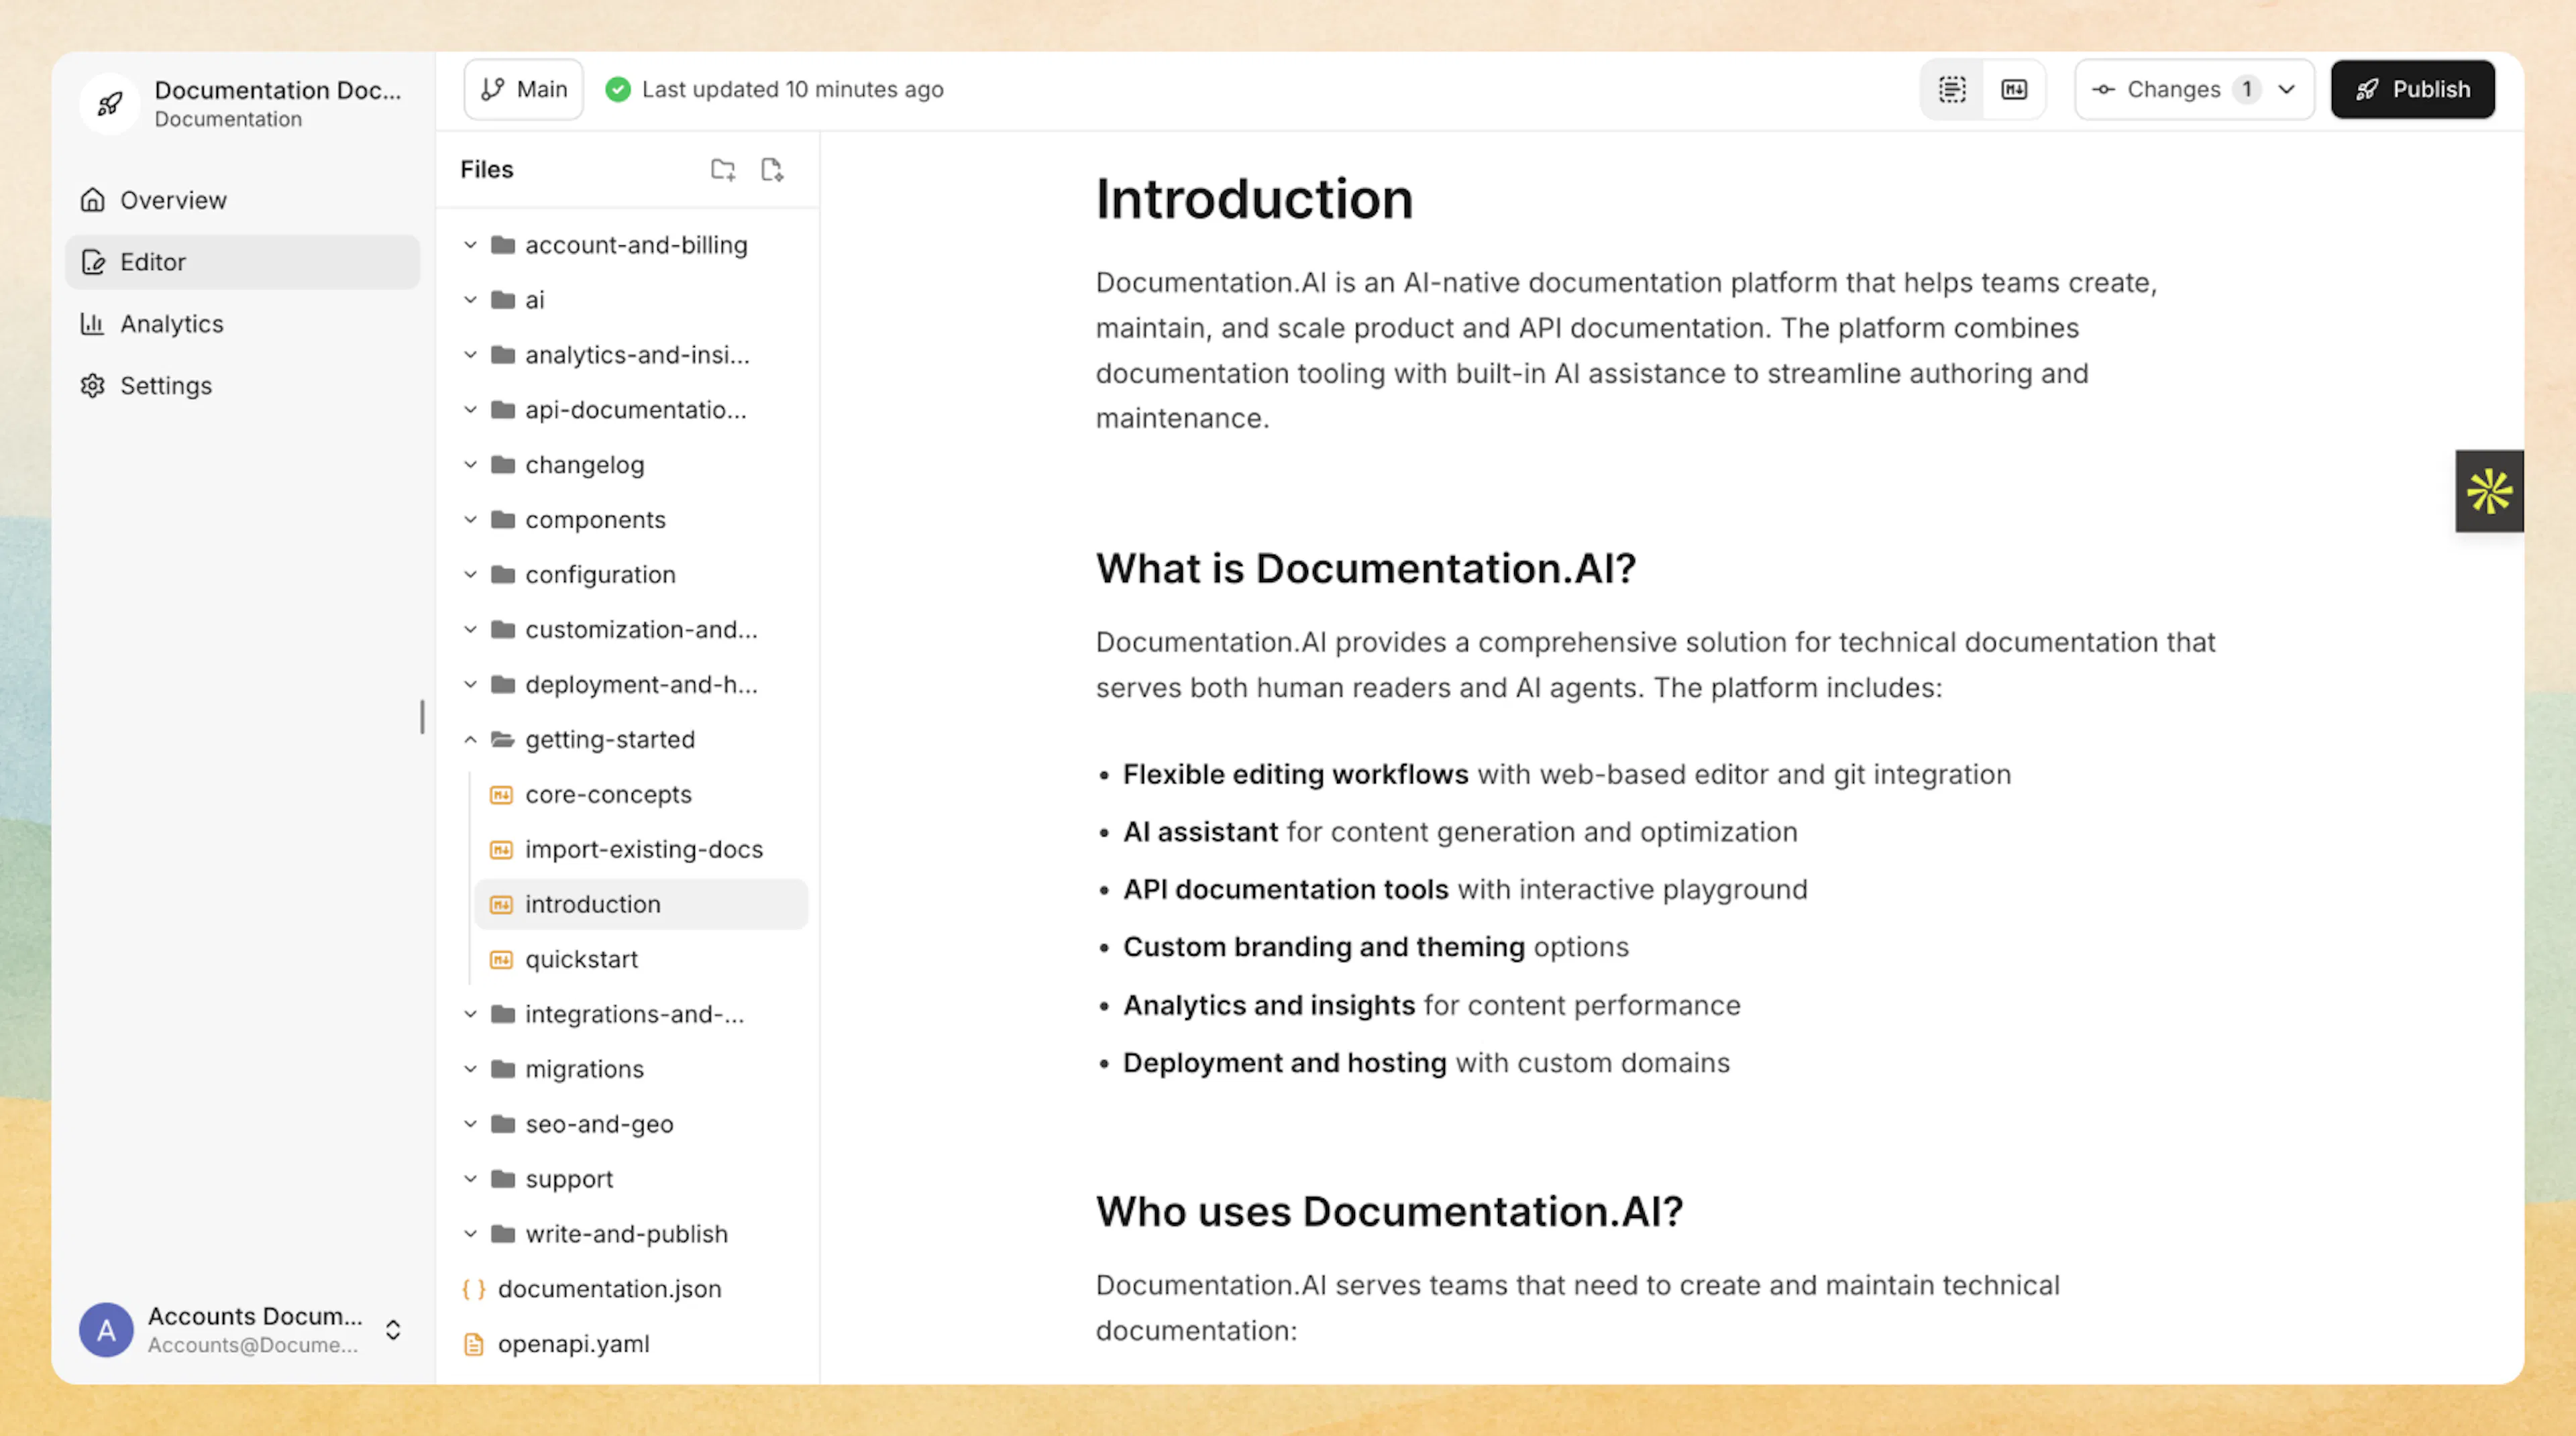
Getting started with the web editor
1. Open the editor from the dashboard
-
Sign in to Documentation.AI, and go to Editor from the dashboard.
-
The web editor opens for your selected project.
If you work in multiple projects, use the project switcher in the dashboard before opening the editor so you are editing the correct documentation set.
2. Browse the documentation structure
In the web editor, your content follows the same organization model as the rest of your project. At a high level:
-
Dimensions are optional, and when present they are always the outermost container.
-
Views are layout or navigation containers (Tabs or Dropdowns) that sit inside a dimension, or at the root when you do not use dimensions.
-
Groups and pages hold the actual content.
This model controls what you see in the left sidebar and which page you are editing.
-
Dimensions: Optional top-level documentation spaces for different audiences or products, such as separate docs for end users and API consumers. Switching the dimension changes the entire documentation tree you are working in.
-
Views: Layout containers (Tabs or Dropdowns) that arrange content within the current dimension, or at the root when there are no dimensions. Switching the view changes which groups and pages appear in the sidebar.
Within the selected dimension (if any) and view, the left sidebar typically shows:
-
Top-level tabs such as Documentation, Changelog, and Help.
-
Groups or sections (for example, Getting Started, Write and Publish, Organize) that act as folders for related content.
-
Pages inside each group (for example, Web Editor, Code Editor, Pages) that you can open and edit.
From the sidebar you can:
-
Expand a group to reveal all pages inside it.
-
Select a page to load it in the editor.
-
Use search to jump directly to a page by title or content.
Your edits always apply to the page that is currently selected in the sidebar. To go deeper into how pages work, including titles, slugs, and metadata, see Pages.
3. Create a new page
To add new content to your documentation:
-
In the editor, on the left-side menu, select the appropriate dimension (if present) and view.
-
Navigate to the group where you want the new page to live, or create a new group first if needed.
-
Use the option in the sidebar to create a new page within that group (see adding a new page in the web editor for details).
-
Enter a page title and start writing in visual or markdown mode.
-
Adjust the page's position within the group using the left-side structure if you need to reorder it later.
For more detail on how dimensions, views, groups, and pages behave across your project (including slugs, paths, and metadata), see the organize overview and the focused guides on dimensions, views, groups, and pages.
Organizing structure in the web editor
Use the web editor to make safe, incremental changes to your documentation structure while keeping it consistent with your overall organization model.
Choose the right dimension and view
If your project uses dimensions, start by selecting the correct dimension in the sidebar. Then choose the appropriate view within that dimension (or at the root if there are no dimensions) so you are working on the right part of the tree.
Add views with Tabs or Dropdowns (optional)
Use views to introduce Tabs or Dropdowns when you need multiple layouts or navigation tracks within a dimension or at the root.
The views model follows a one-child rule: each Tabs or Dropdowns container should have a single type of child (pages, groups, or another nested view). For supported patterns and examples, see the views guide.
Decide between groups and flat pages
Use groups when you have several related pages that should be nested together. Avoid mixing grouped and ungrouped pages at the same level: once you introduce groups under a parent, new pages should live inside one of those groups rather than alongside them.
If you only have a few pages, you can keep them flat without groups.
Create pages with stable slugs
Add pages where you want new content to live. Each page is backed by MDX and identified by a stable path (slug). Prefer keeping paths stable over time and move pages within the structure instead of renaming paths when you reorganize. When you must change a path, use redirects as described in the pages guide.
Plan patterns at a higher level
Use this page for quick structural edits and content changes. For larger reorganizations across dimensions, views, and groups, refer to the organize overview to choose patterns that scale before you start editing in the web editor.
Writing content
You can write in two modes:
-
Visual mode: Block-based WYSIWYG editing.
-
Markdown mode: Direct MDX editing with full control over components.
Use the mode toggle in the editor toolbar to switch at any time.
Visual mode
Visual mode shows your content as it will appear on your published site. You work with blocks instead of raw syntax.
In visual mode you can:
-
Type content directly and see formatting as you go.
-
Use the toolbar to apply headings, bold, italics, links, and inline code.
-
Press
/to insert blocks and components. -
Drag and drop blocks to reorder content.
-
See components rendered as they will look when published.
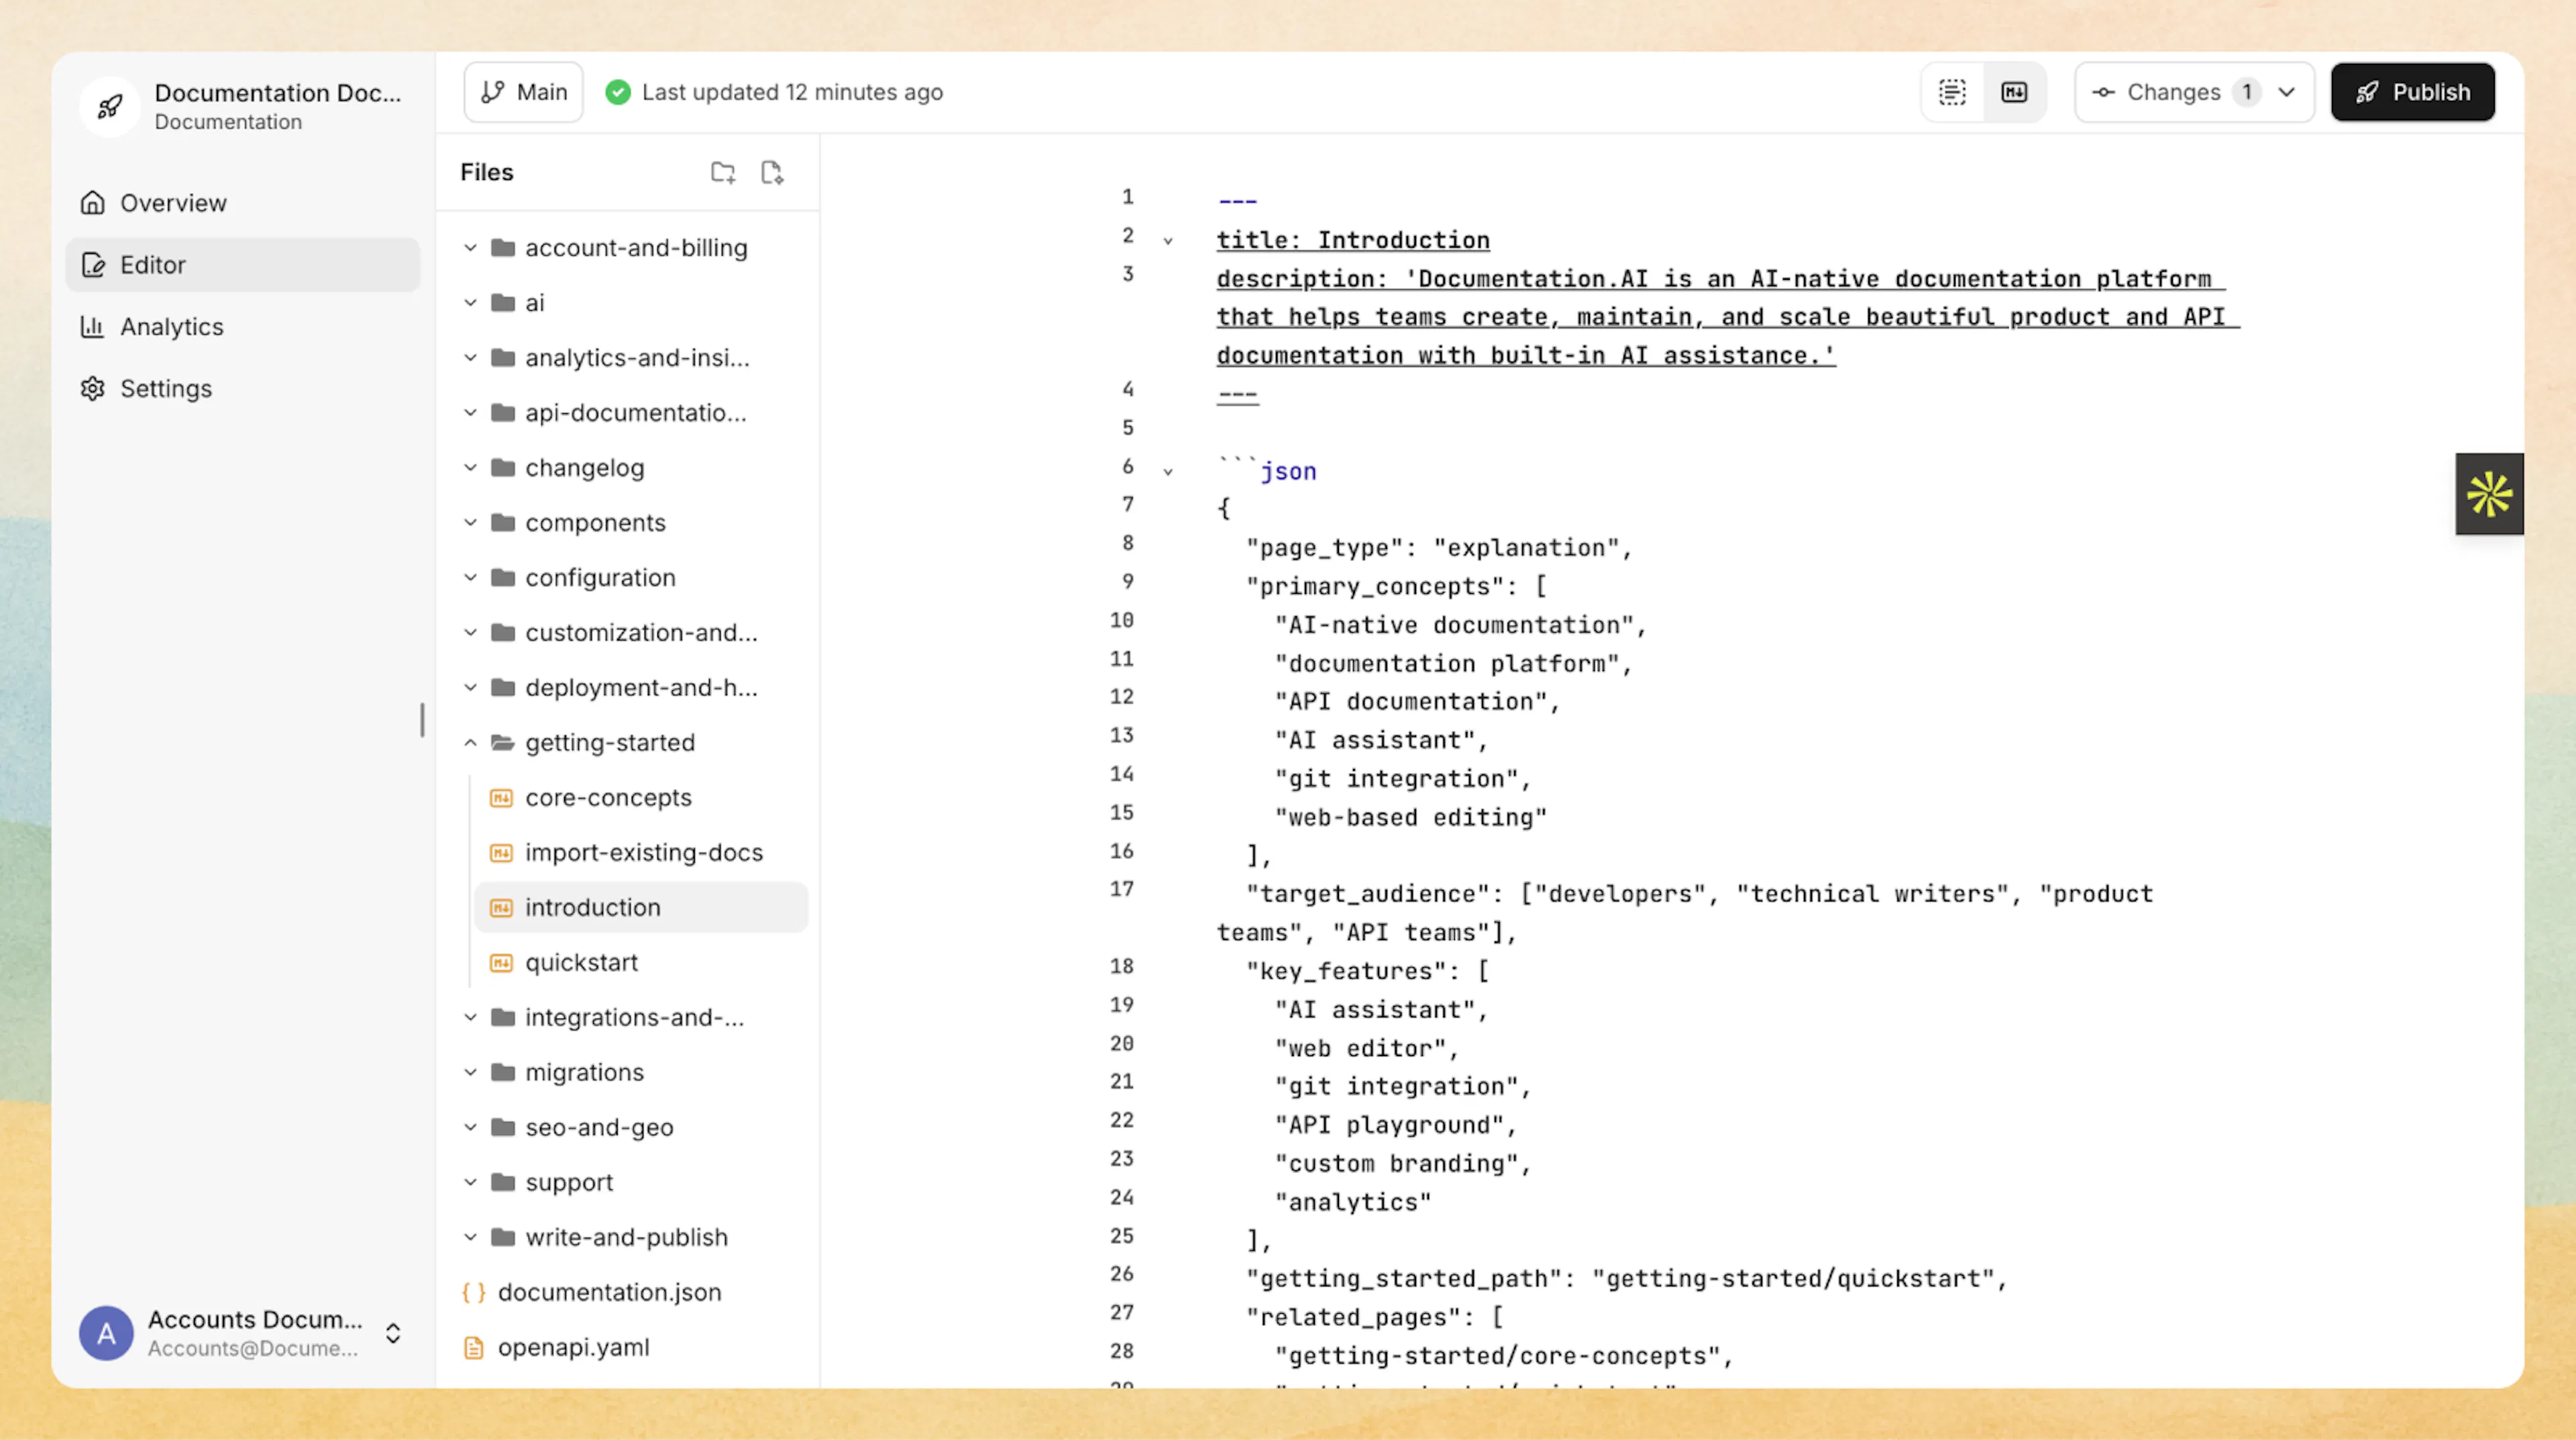
Markdown mode
Markdown mode exposes the underlying MDX source for your page so you can work directly with syntax and component props.
In markdown mode you can:
-
Write with standard markdown for headings, lists, and links.
-
Use Documentation.AI components with JSX syntax:
<Callout kind="info">
  Use callouts to highlight important information for your readers.
</Callout>
-
Edit component properties and nesting precisely.
-
Add custom HTML when needed for advanced layouts.
-
Copy and paste content from other markdown sources.
Headings, links, and structure
Use headings and links to keep your documentation easy to scan:
-
Use a single top-level page title in frontmatter, then start content with
##headings. -
Create a clear outline with
##and###sections. -
Use descriptive link text (for example,
[Quickstart](/getting-started/quickstart)instead of “click here”). -
Break long pages into logical sections instead of one large block of text.
In visual mode, you can set heading levels using the toolbar. In markdown mode, use ##, ###, and so on.
For component-specific patterns, see:
Adding rich content
The web editor makes it easy to add code samples, callouts, images, and other documentation components.
Using slash commands
Type the slash key / in an empty line or at the start of a block to open the component menu.
From the menu you can quickly insert:
-
Basic content: text, headings, lists, dividers
-
Rich content: code blocks, images, tables, quotes
-
Documentation.AI components: callouts, cards, steps, tabs, expandables, and more
You can always adjust block type, position, and properties after inserting.
Code blocks and technical content
Use code blocks for examples and snippets:
-
Insert a code block via
/code. -
Choose a language for syntax highlighting (for example,
bash,ts,python). -
Keep examples focused and copy-pasteable.
For more advanced scenarios, you can use the code and API components described in the components section of the docs:
Callouts and guidance
Use callouts to highlight important information, warnings, or tips.
In markdown mode:
<Callout kind="tip">
  Use callouts to emphasize best practices or caveats that readers should not miss.
</Callout>
In visual mode:
-
Type
/calloutand pick the style (info, tip, success, alert, danger). -
Edit the text directly in the rendered block.
To learn more about callout types and options, see Callout.
Images and media
You can add screenshots, diagrams, and media directly from the web editor:
-
Insert an image via
/imageand upload a file or paste a URL. -
Provide clear alt text so content remains accessible.
-
Resize or reposition images using the visual controls when available.
For videos or interactive content, use /video or /iframe (depending on your configuration) to embed external media.
To learn more about the underlying components, see:
Organizing and reviewing content
As this page becomes the main entry point for the web editor, you will often use it alongside the project organization features.
Moving and organizing pages
Use the sidebar to adjust your documentation structure:
-
Create new groups or sections for related pages.
-
Move pages into different groups to keep navigation intuitive.
-
Rename pages and update slugs where needed, while keeping paths as stable as possible.
For a deeper look at how dimensions, views, groups, and pages work across your project, see the high-level organize overview and the focused guides on dimensions, views, groups, and pages.
Collaboration and review
The web editor is built for teams:
-
Multiple collaborators can open and edit content.
-
Changes are auto-saved as you type.
-
You can review edits in the editor before publishing.
Use your team’s review process (for example, checklists, issue trackers, or comments in your existing tools) around the web editor to keep changes controlled and traceable.
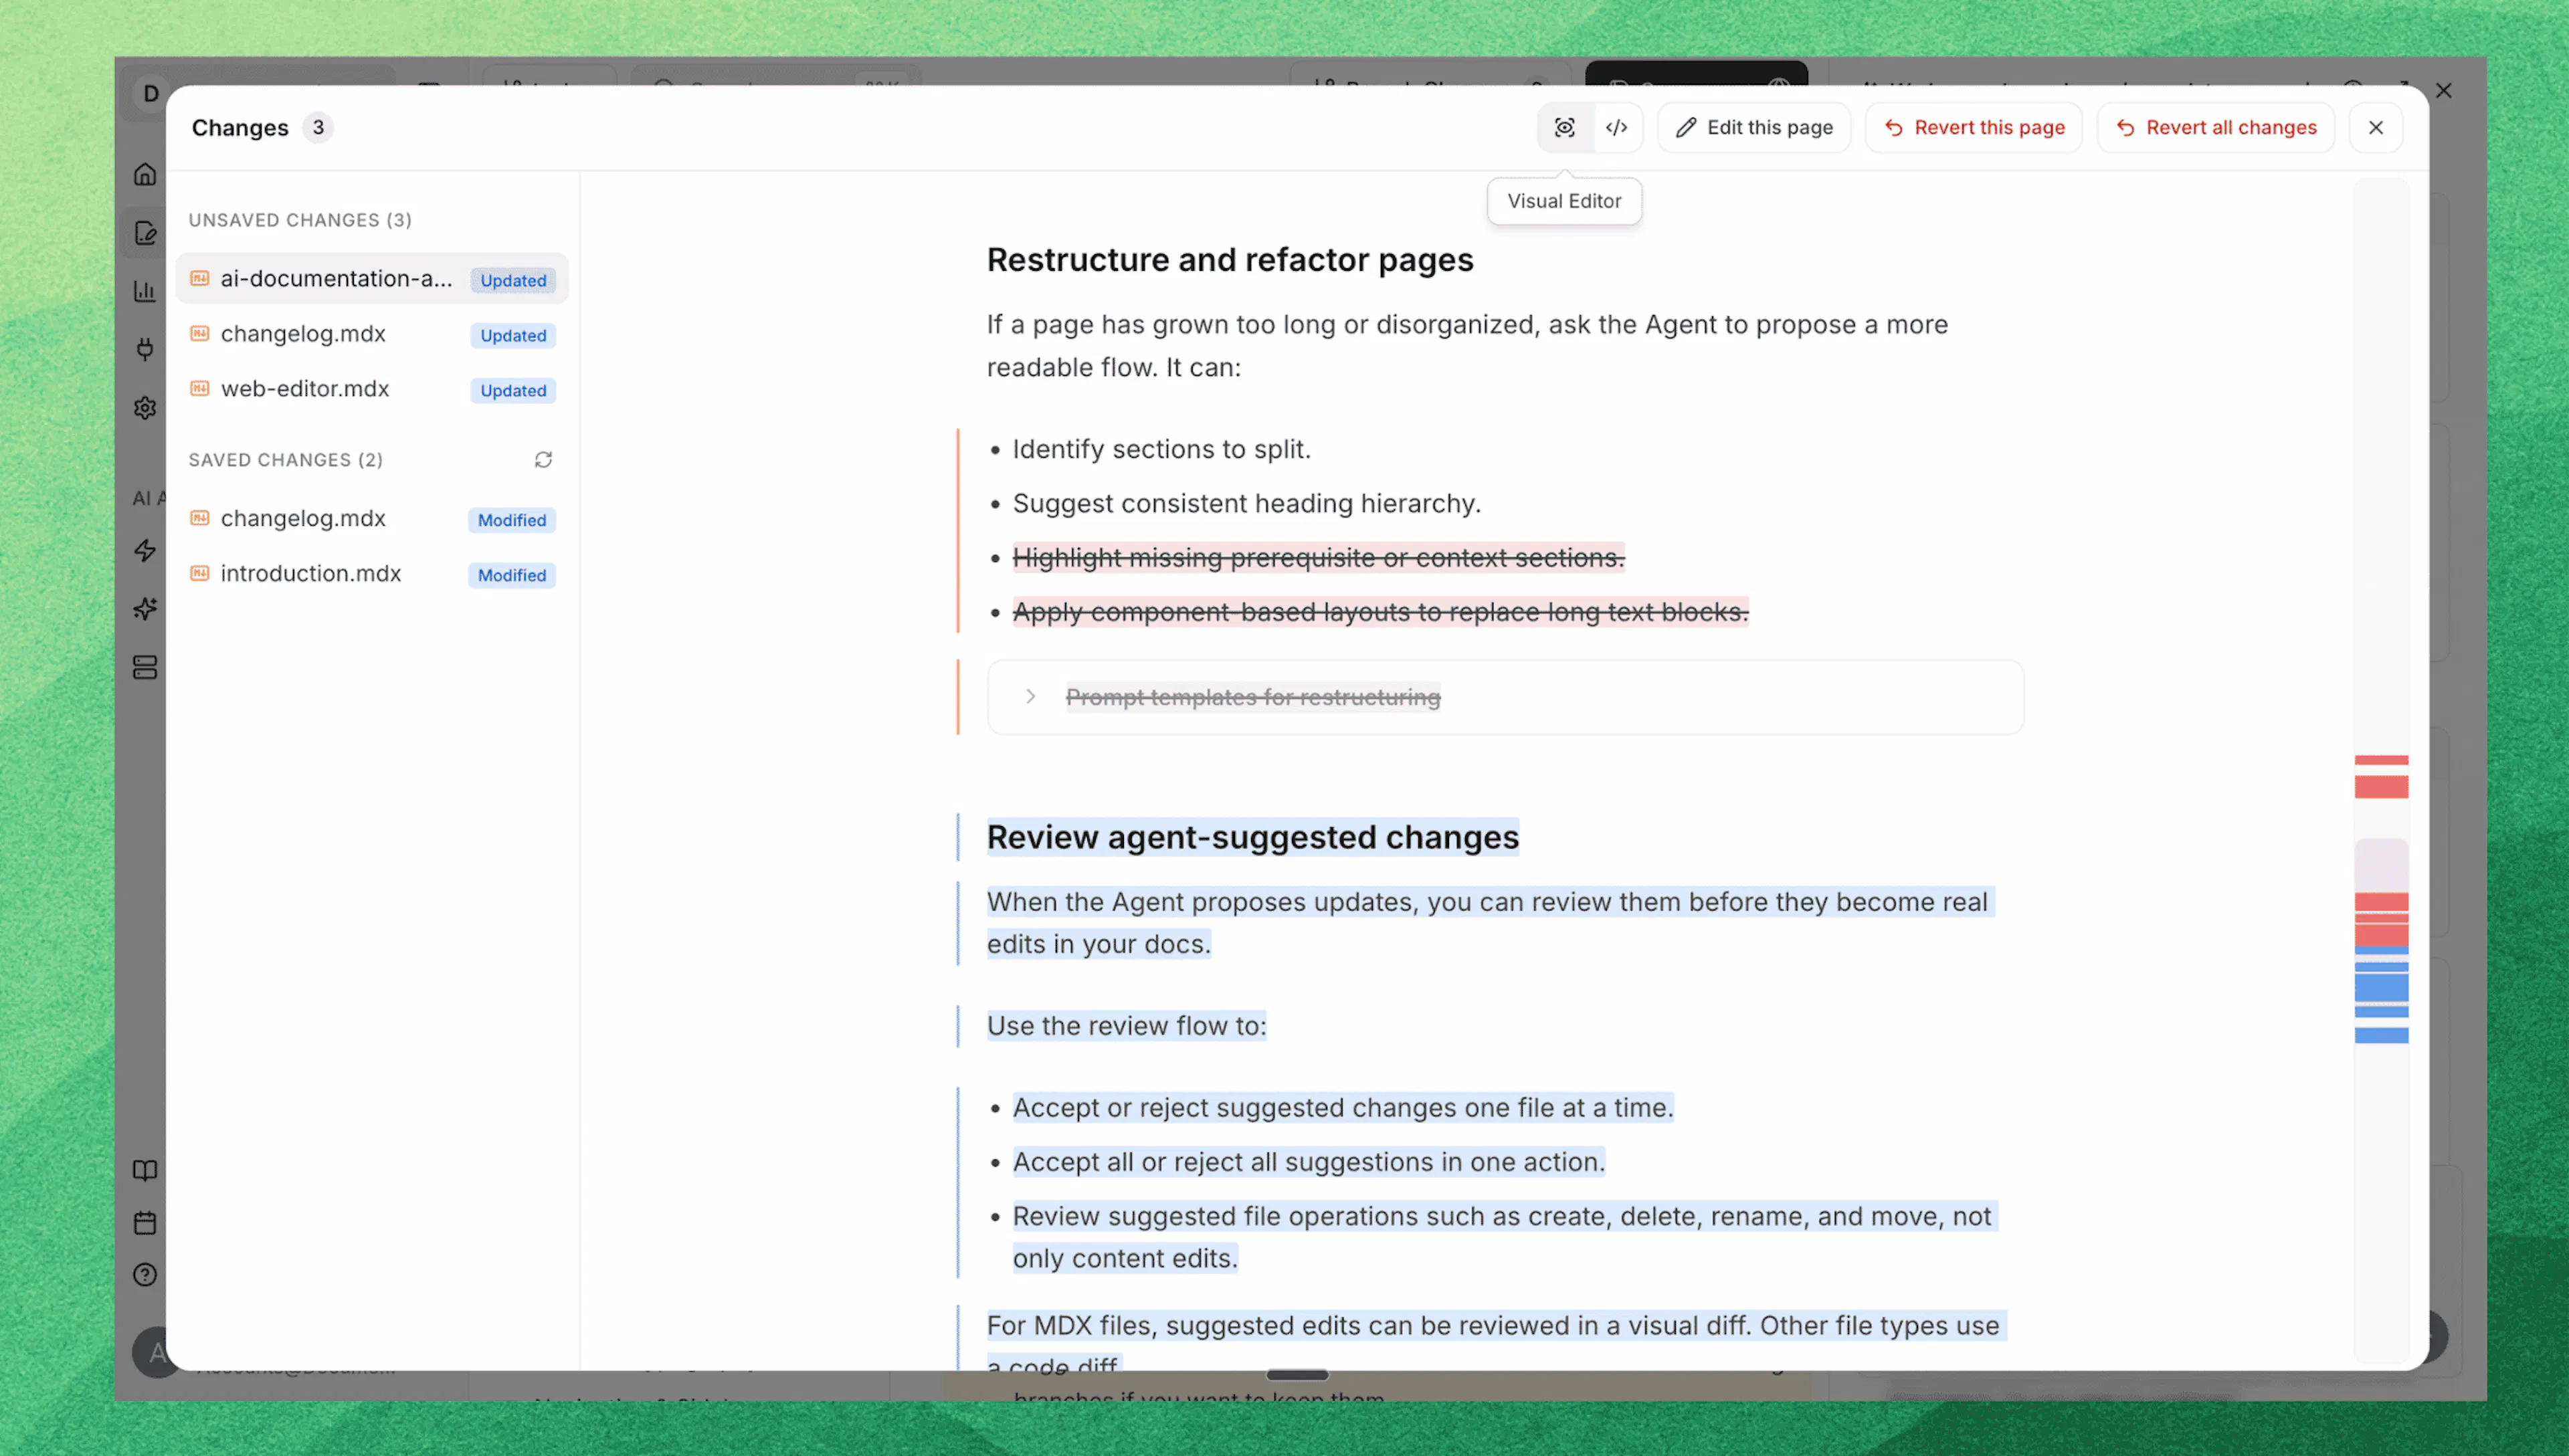
Review changes in the editor
Use the Changes view to review all the changes visually
-
AI changes — Review agent-suggested changes file by file, then accept or reject individual suggestions or all suggestions at once.
-
Saved changes — Compare saved changes on your current branch against the default branch.
-
Unsaved changes — Review local unpublished edits before you publish.
For content pages, the editor shows a visual diff with highlighted additions and deletions. For other file types, the Changes view uses a code diff.
From the unsaved changes review flow, you can revert a single page or revert all pending changes when you want to discard local edits.
Publishing workflow
The web editor separates editing from publishing so you can work safely before sending changes live.
A typical loop:
-
Edit
Open a page in the web editor, make changes in visual or markdown mode, and ensure the structure looks correct. -
Review in the editor
-
Scan headings and navigation.
-
Confirm code blocks, callouts, and components render correctly.
-
Check images and embeds.
-
-
Publish
When you are satisfied with the page:-
Use the publish action in your project to deploy changes.
-
Wait for the publish process to complete.
-
-
Verify on the live site
Open the updated page on your documentation site:-
Confirm layout and content match what you saw in the editor.
-
Test any links or interactive elements.
-
You can repeat this cycle as often as needed. For teams that require code review, or if you prefer a Git-based pipeline, use the code editor overview to understand the alternative publishing flow.
Site Config
The Editor includes a built-in Site Config panel for managing documentation settings alongside your content. Click Site Config in the Editor top toolbar to open it.
From Site Config you can manage:
-
General — site title and description
-
Brand & Theme — template, logos, and theme colors
-
Header & Routing — navbar actions, links, and initial route
-
SEO — robots indexing, llms.txt generation, and sitemap
-
Integrations — analytics and chat providers (learn more)
-
Custom Scripts — third-party JavaScript injection (learn more)
-
AI Agent — AI assistant settings and Page Actions
-
Feedback — page-level reactions and follow-up surveys
-
Redirects — URL forwarding rules
Changes you make in Site Config appear in the Changes panel just like content edits, and they are deployed when you click Publish. For the full configuration reference, see site configuration.
Unpublish your documentation
If you need to take your documentation site offline, you can unpublish it from the dashboard Settings page (this action is in the dashboard, not in the Editor's Site Config panel).
Open documentation settings
Navigate to Settings → Documentation Settings → General and scroll to the Danger Zone section.
Unpublish
Click Unpublish Documentation and confirm in the dialog.
When you unpublish:
-
Your live documentation site becomes inaccessible to readers.
-
Custom domain connections are removed.
-
Search engine indexes will eventually drop your pages.
-
Your content and configuration in the Editor are preserved — nothing is deleted.
To bring your site back online, open the Editor and click Publish again. Your documentation will redeploy with all content and settings intact.
Unpublishing removes public access but does not delete content or configuration. You can republish at any time.