

Email Verification
Let readers sign in with a one-time code sent to their email, and decide who gets in.
Email verification is available on Pro plans or higher.
Readers enter their email address and the one-time code we send them. There is no password to share and no identity provider to set up. You choose whether every verified email gets in, or whether an admin accepts each reader first.
Use it for documentation you share with people outside your organization, such as customers, partners or beta testers, when you don't run your own sign-in for them.
Email verification works in both modes:
- Private: All pages require sign-in.
- Partial: A mix of public and protected pages. You choose which pages are public with the
publicproperty in your navigation, as described in Partial access control.
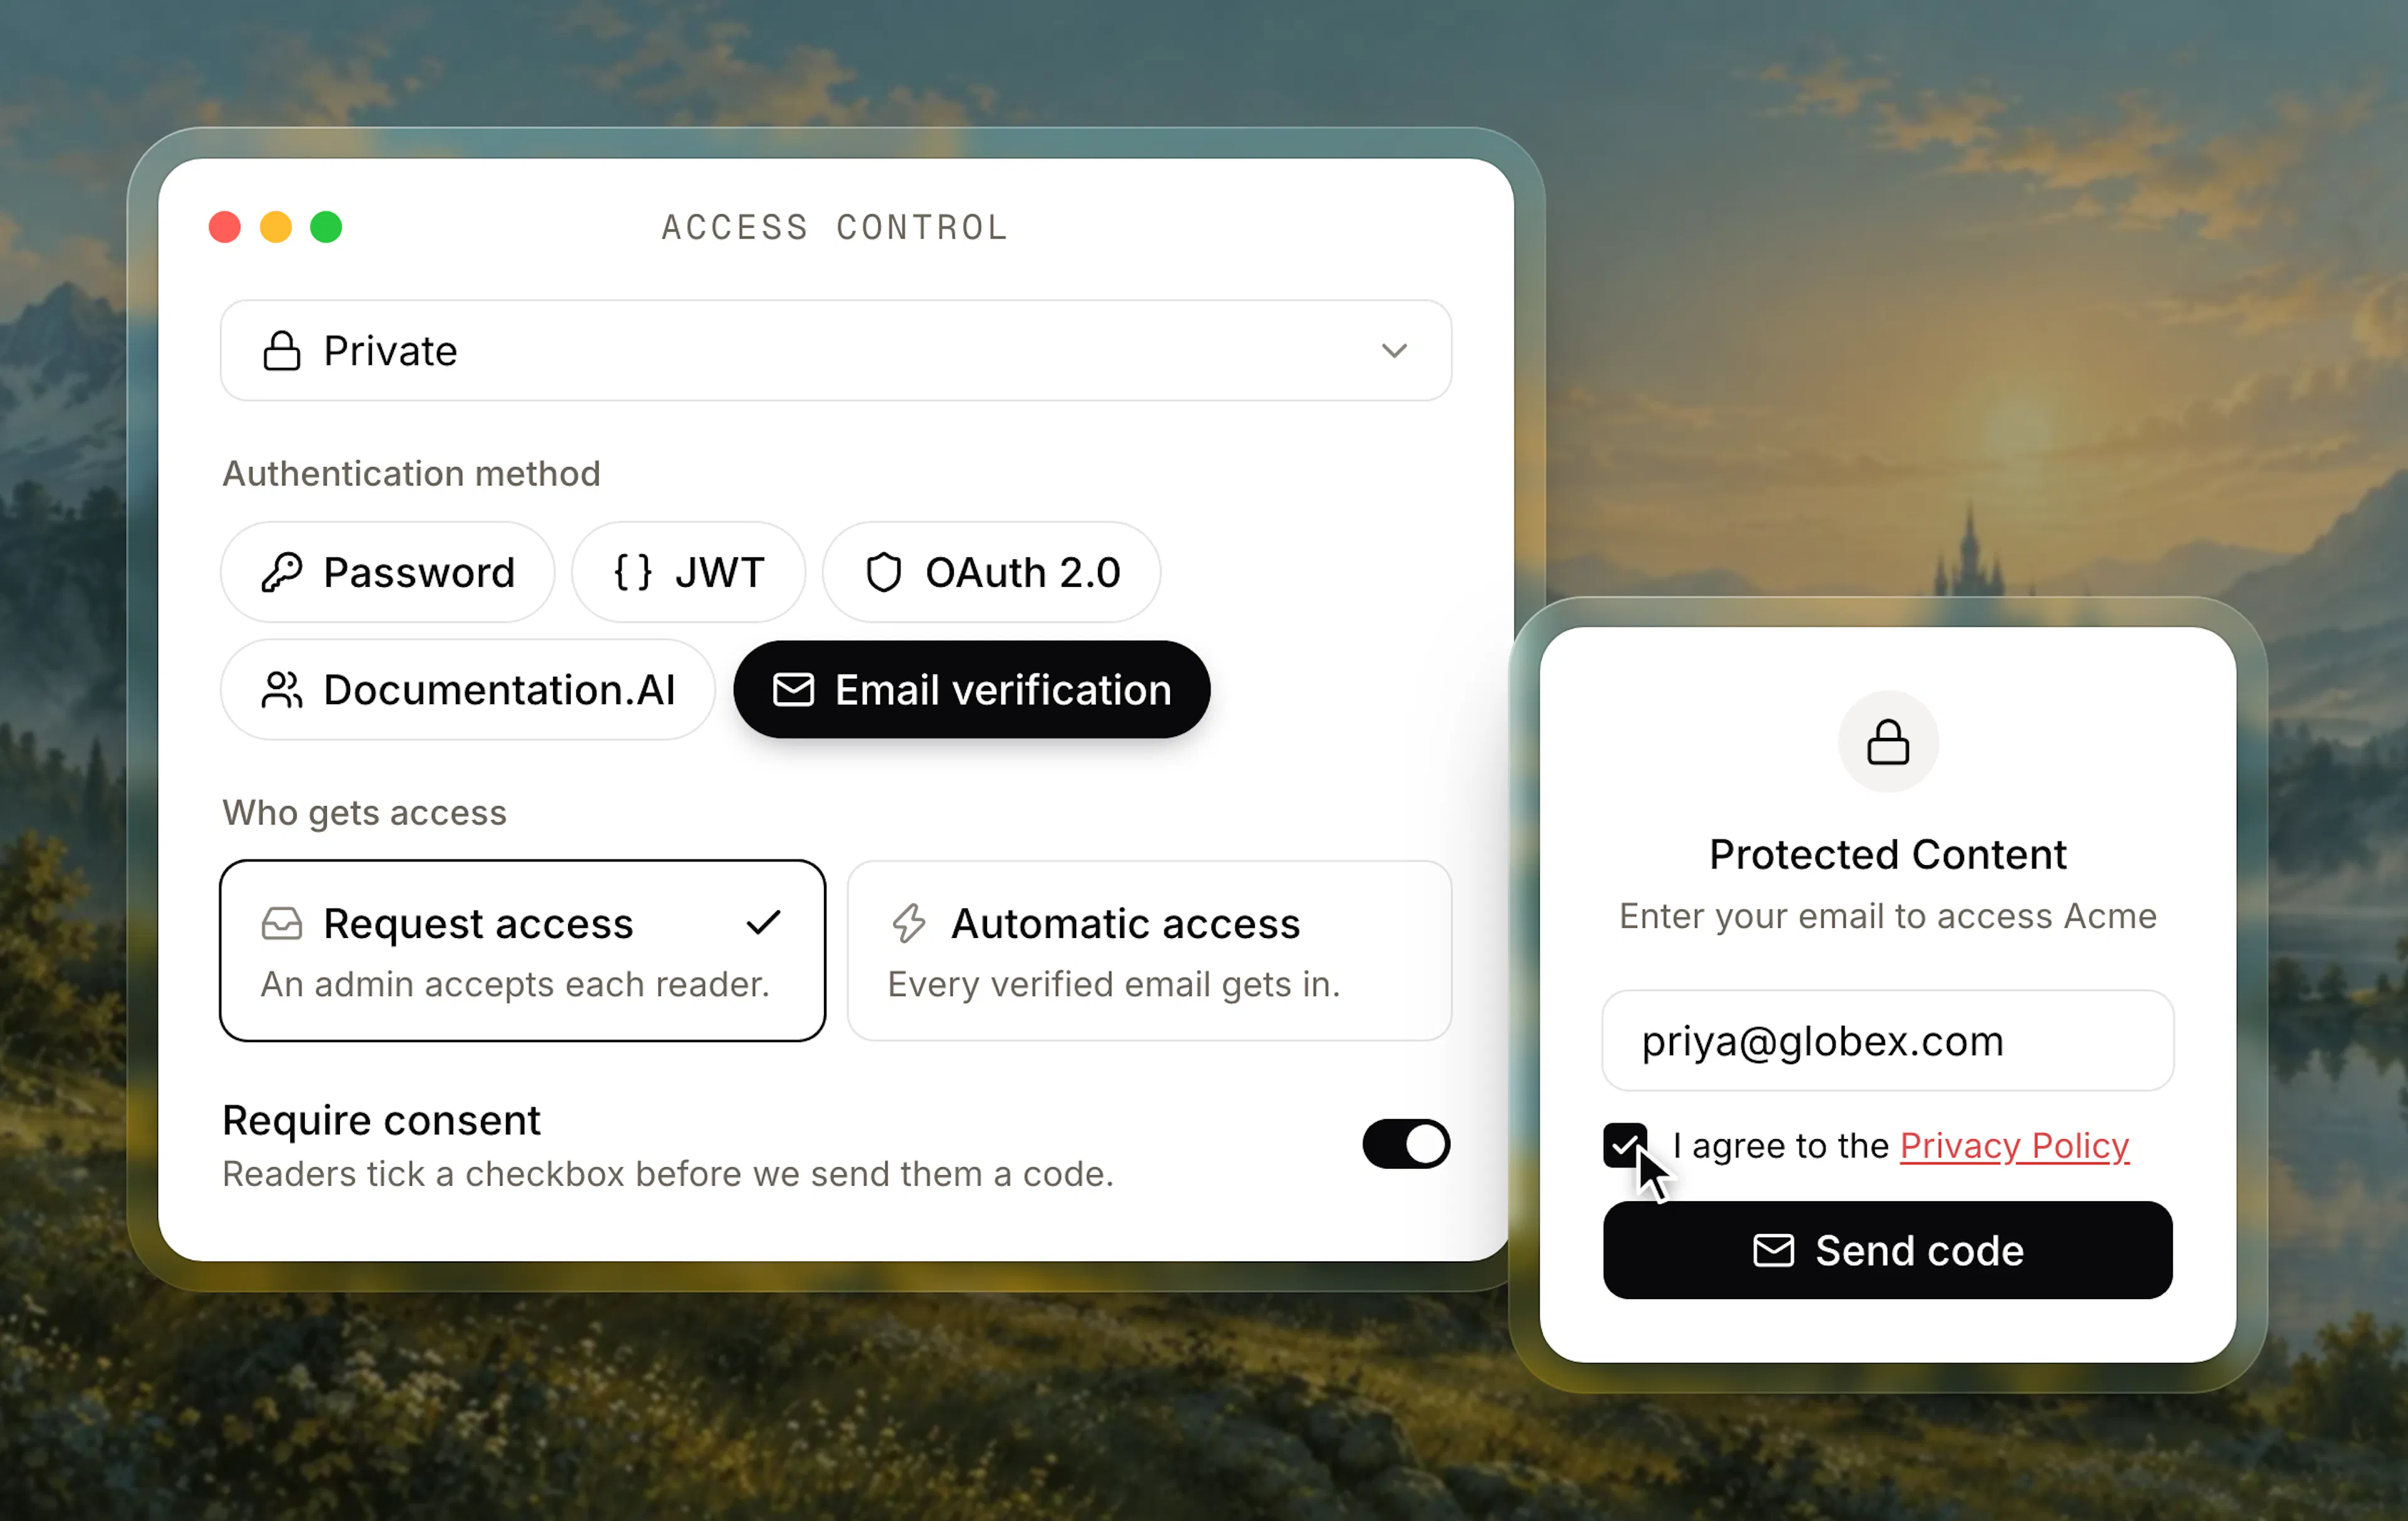
Who gets access
Choose one of two modes under Who gets access:
| Mode | What happens when a reader verifies their email |
|---|---|
| Request access | The first time, their request goes to your admins. They can read once an admin accepts them, for as long and with the roles the admin chooses. |
| Automatic access | They get in straight away and can read every protected page. You set how long their access lasts. |
With Automatic access, choose how long access lasts in Access expires: Never (the default), 1 day, 7 days, 14 days or 1 month. When it runs out, the reader verifies their email again and gets in for another period.
Set up
Choose access mode
In your dashboard, go to Settings > Access Control and select Private (all pages protected) or Partial (mix of public and protected pages).
Select the Email verification method
In the Authentication Method selector, choose Email verification.
Choose who gets access
Select Request access or Automatic access. For Automatic access, also choose how long access lasts.
Require consent (optional)
Turn on Require consent to show a checkbox that readers must tick before they can request a code, for example to accept your privacy policy.
Write the checkbox label in the field below the switch. It supports links in the form [Privacy Policy](https://example.com/privacy), and can be up to 500 characters.
Save and re-publish
Click Save, then re-publish your documentation so the deployed site uses the updated configuration.
How readers sign in
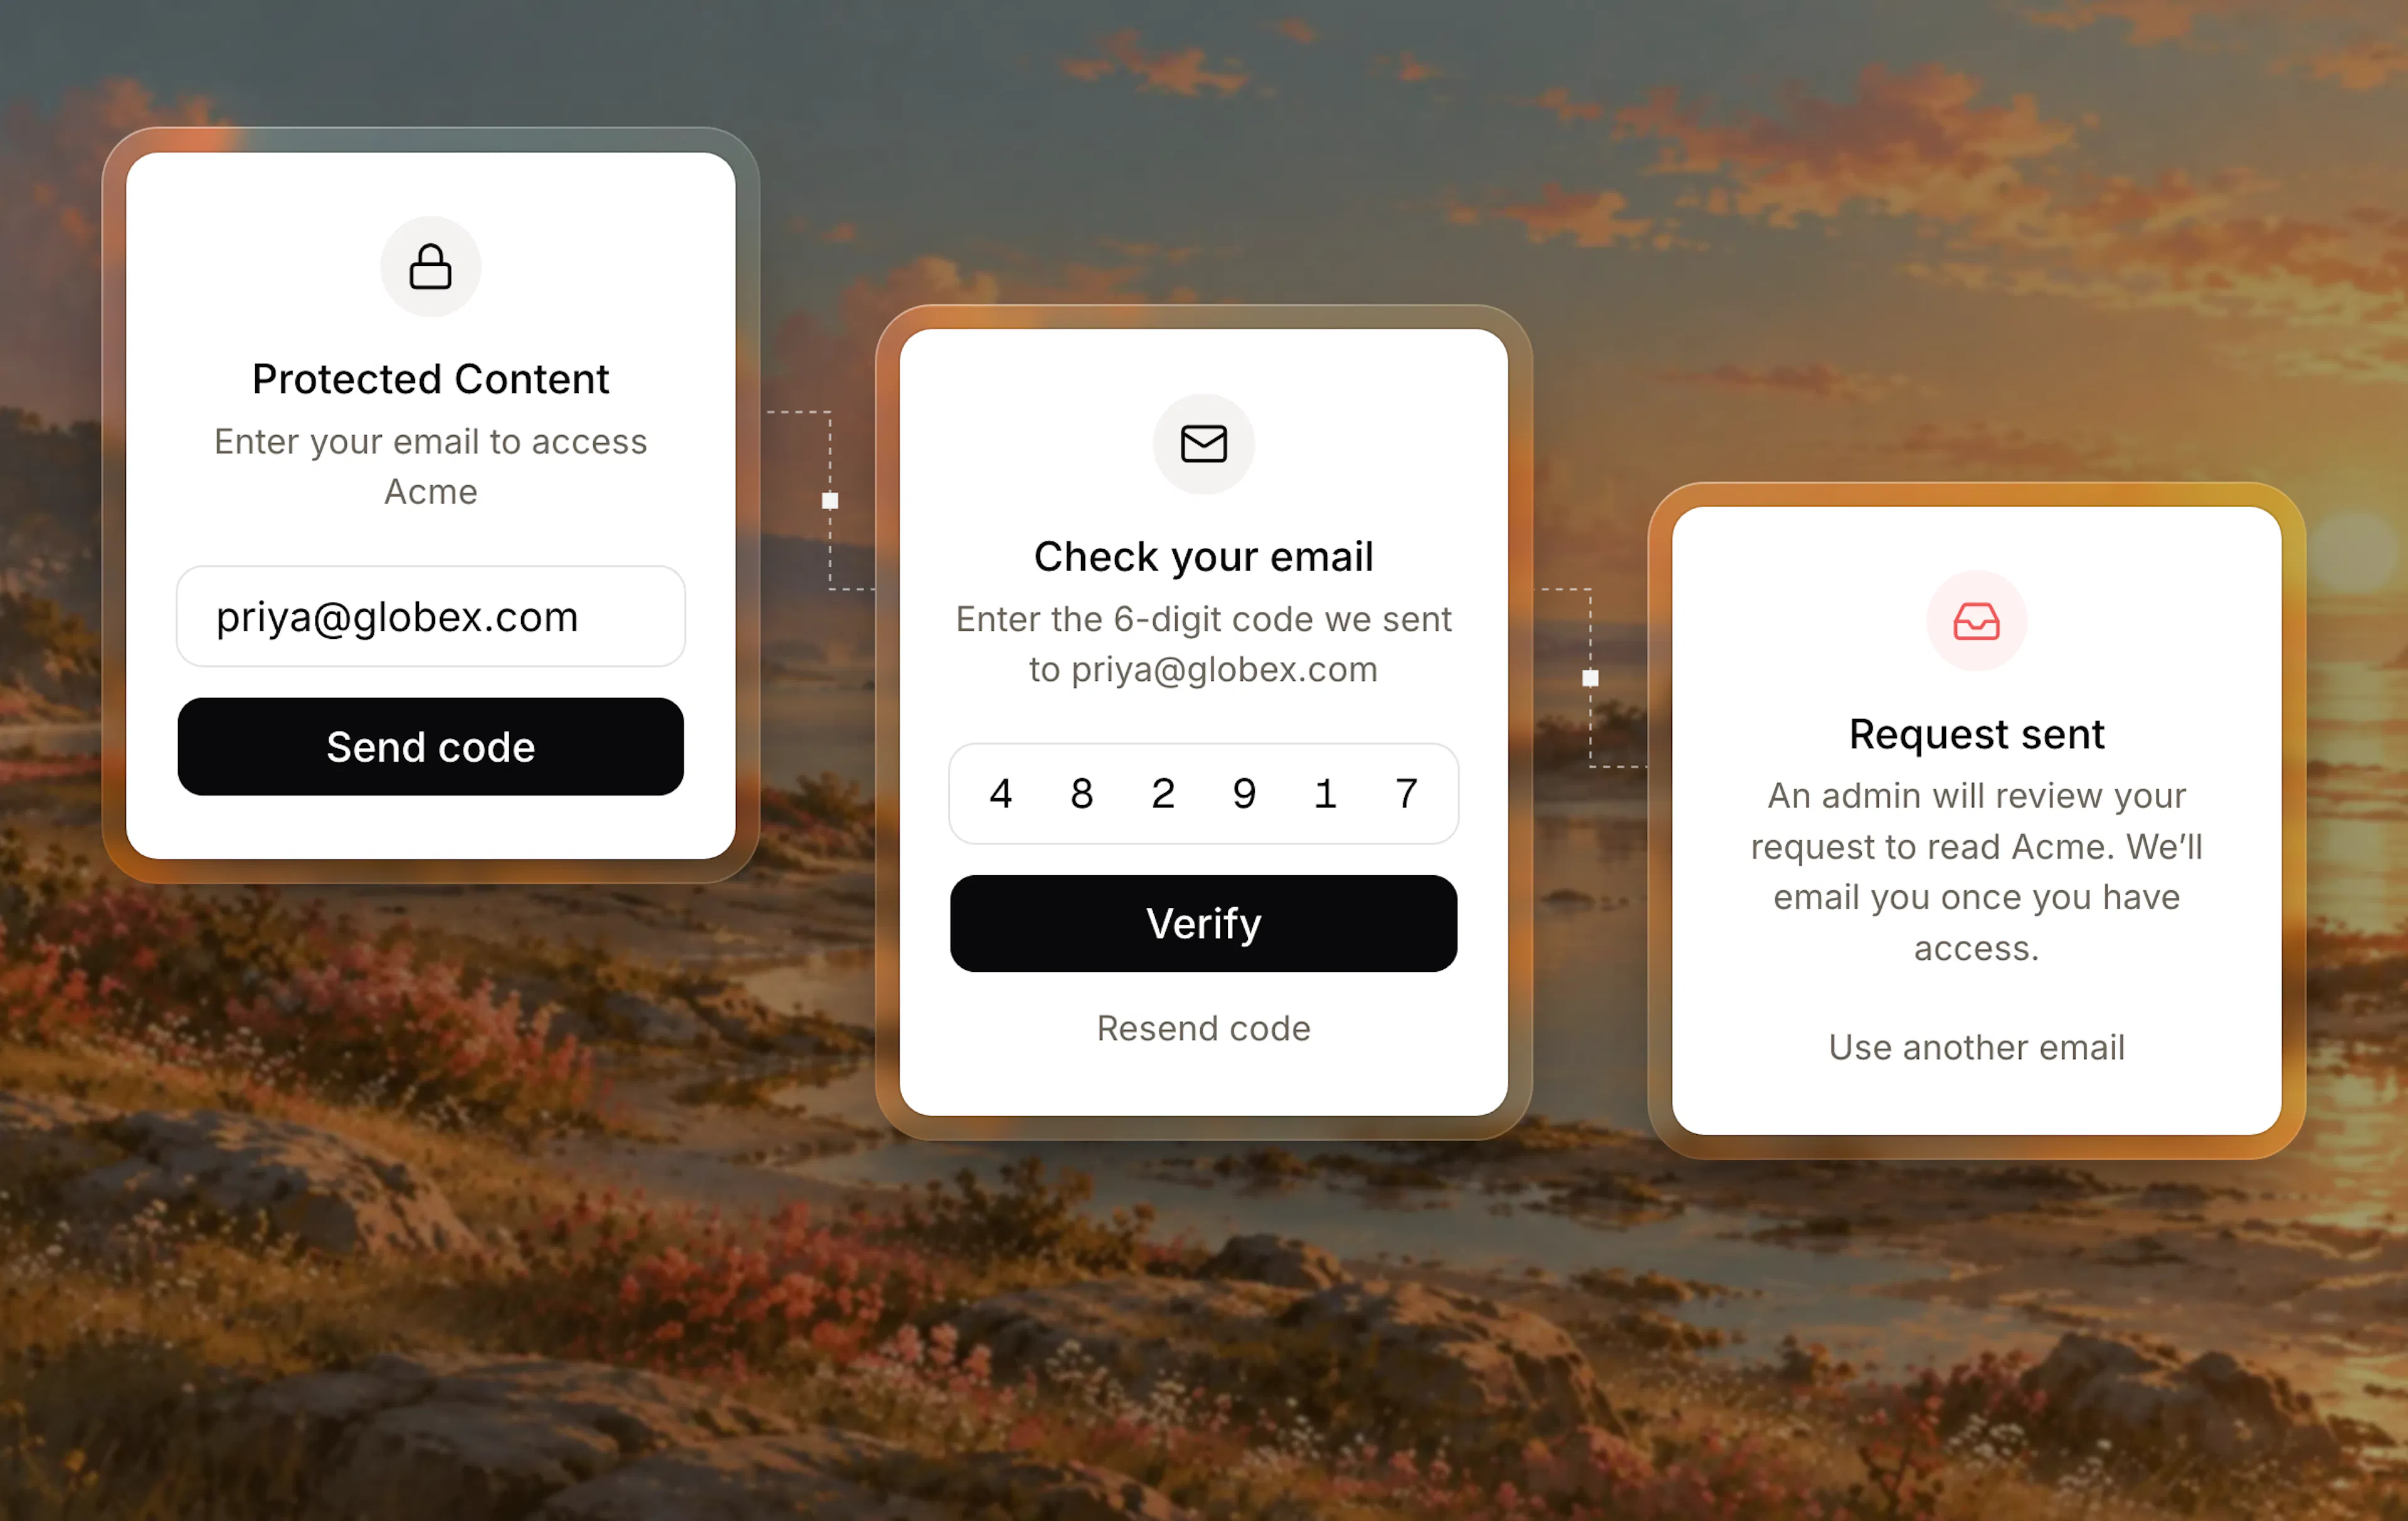
- A reader opens a protected page and enters their email address. If you require consent, they tick the checkbox first.
- We email them a 6-digit code. The code works once and expires after 10 minutes. After 5 wrong attempts it stops working, and they request a new one with Resend code.
- They enter the code and click Verify.
What happens next depends on the mode:
- Automatic access: They go straight to the page they opened.
- Request access: The first time, they see Request sent. Every admin in your organization gets a notification in the dashboard and an email. Once an admin accepts, the reader gets an email saying they can read your documentation, and until when. They return to the site and verify their email again to sign in.
A reader verifies their email both before they request access and after they are accepted. Only someone who controls the inbox can sign in, however long the request waits.
Manage readers
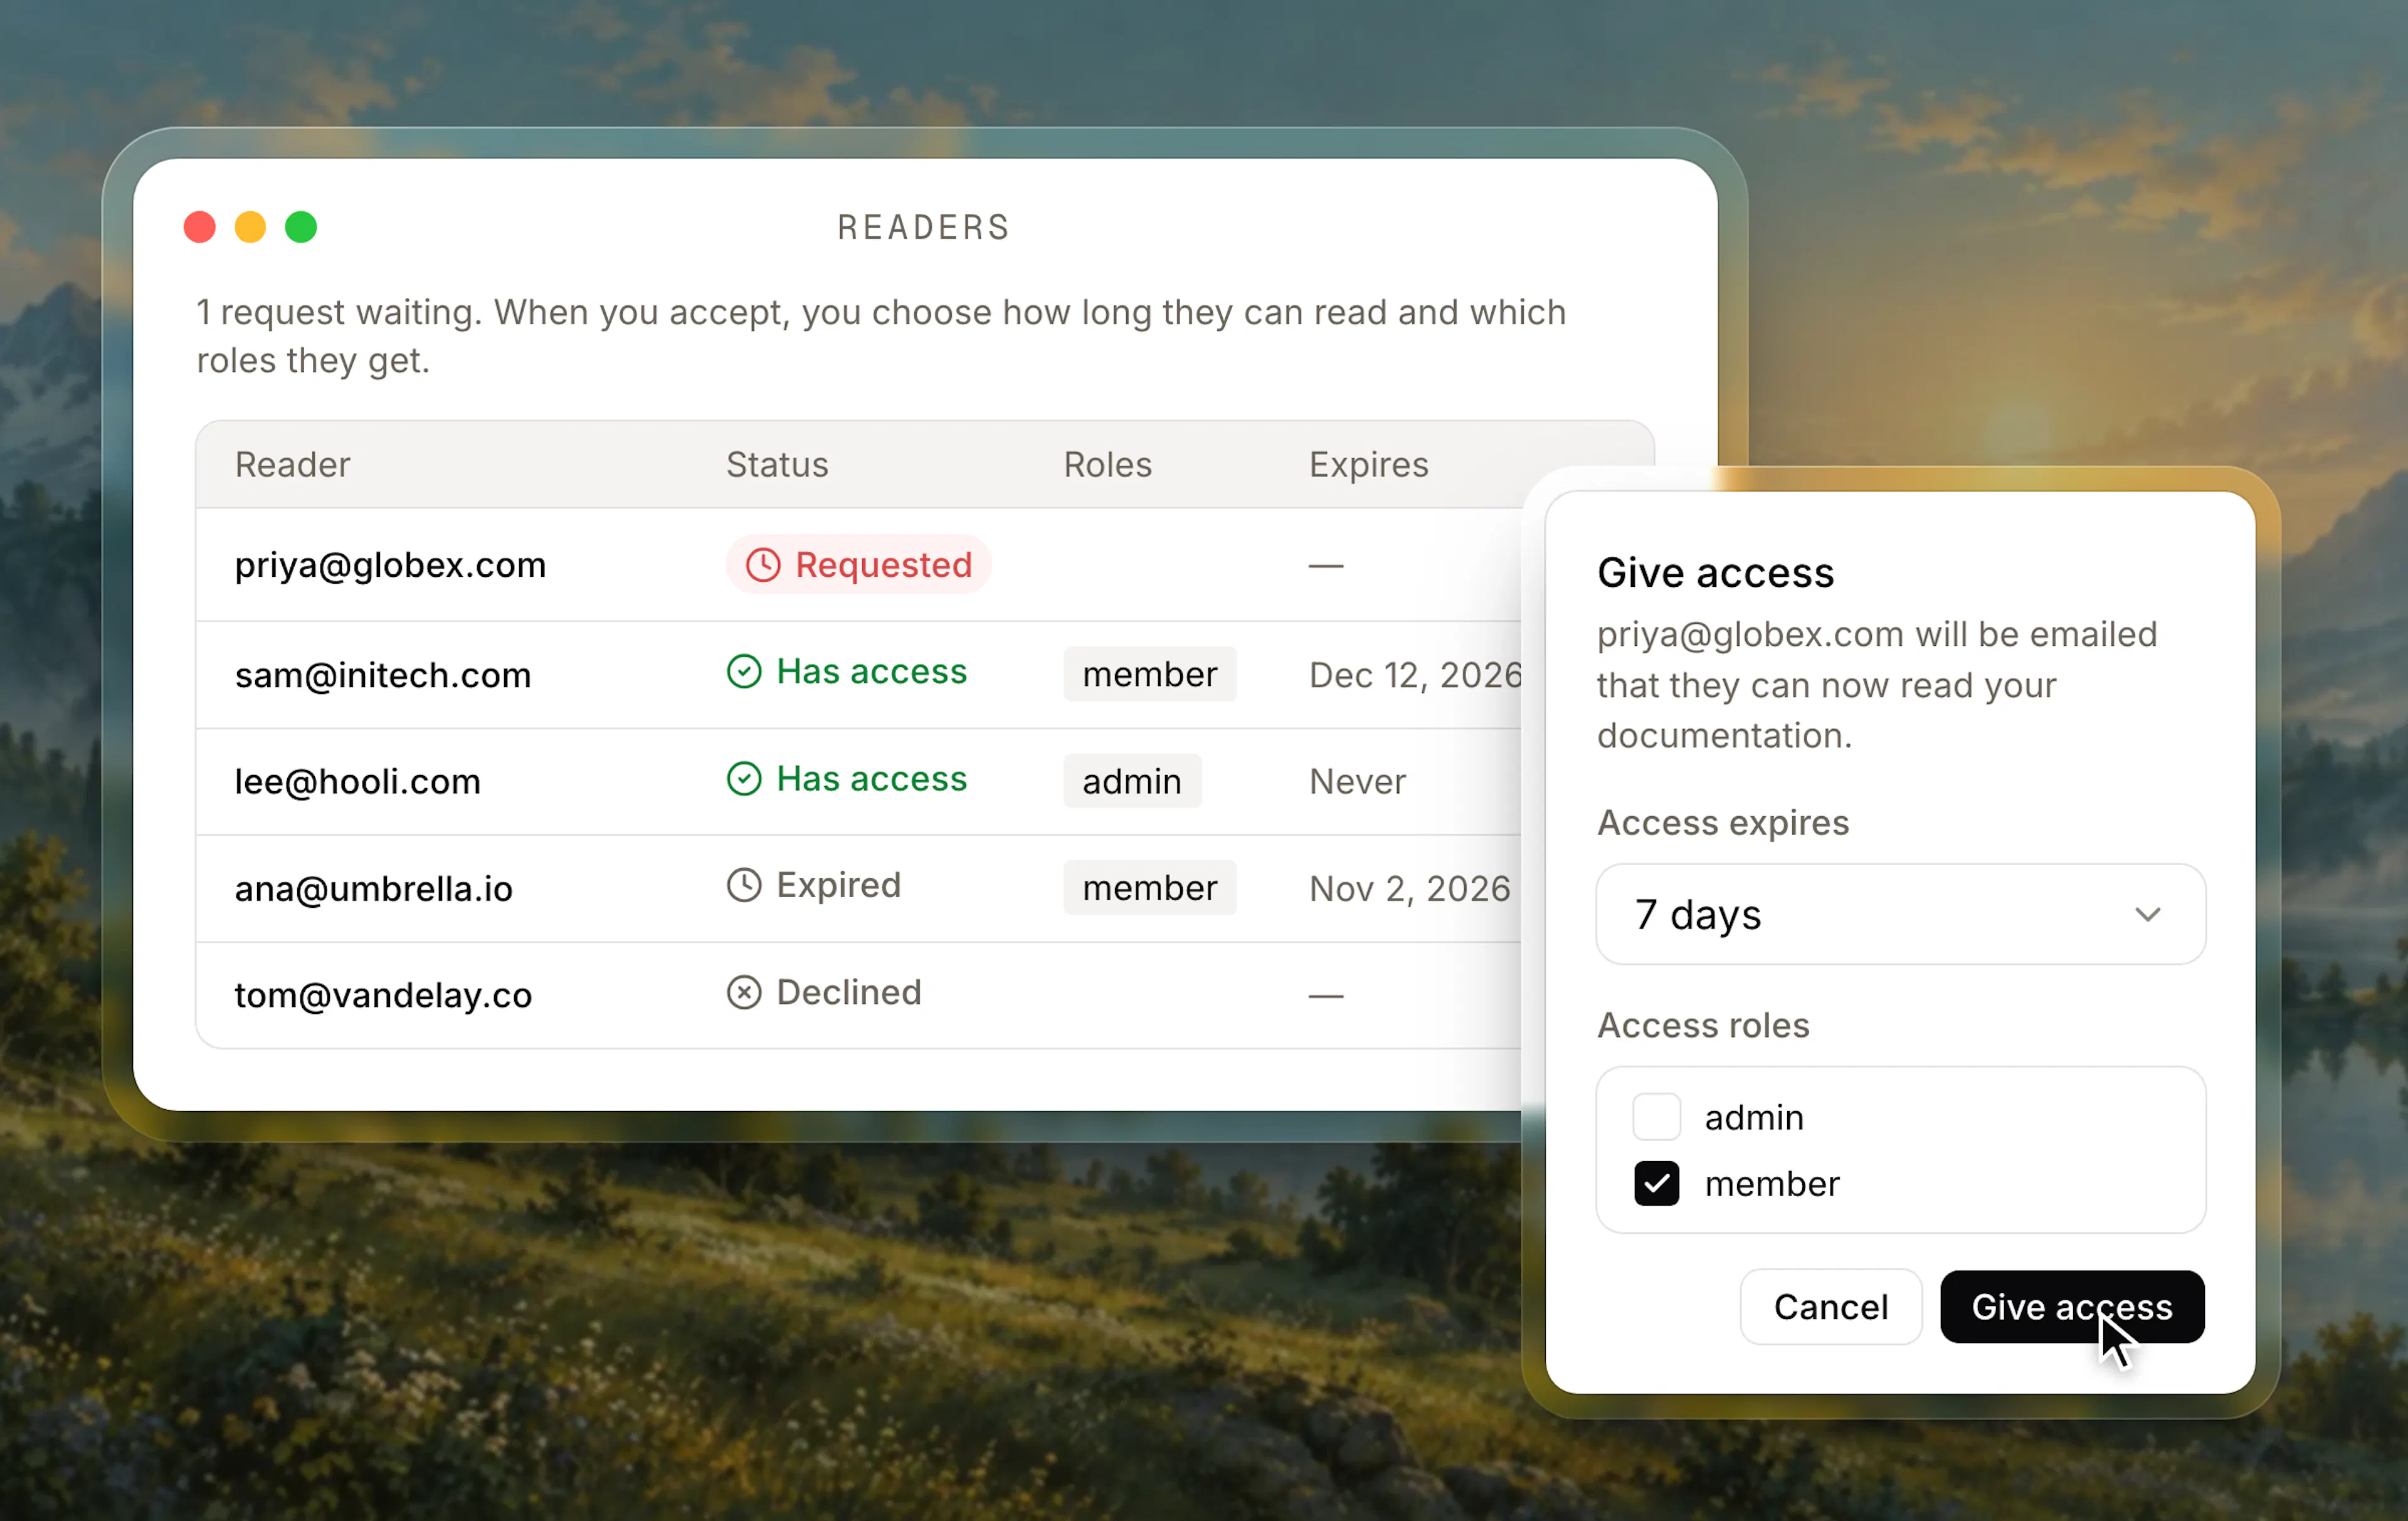
Everyone who verifies their email appears under Readers in Settings > Access Control, with their status, roles, when they last verified and when their access expires.
| Status | Meaning |
|---|---|
| Requested | Waiting for an admin to accept or decline. |
| Has access | Can read until their access expires. |
| Declined | An admin declined their request. |
| Removed | An admin removed their access. |
| Expired | Their access reached its end date. |
Accept or decline a request
- Click Accept & set access. Choose how long the reader can read in Access expires: Never, 1 day, 7 days, 14 days, 1 month or a Custom date. If role-based access is on, tick the roles they get. Then click Give access.
- Click Decline to turn the request down. The reader is told their request was declined.
Change or remove access
Open the menu on a reader's row:
- Change access: Change their expiry date or roles.
- Remove access: End their access. They're signed out within 5 minutes and lose access to pages, search, the AI Assistant and the Reader MCP Server.
- View history: See every verification and every admin decision for that reader, with who made it and when.
You can also give access again to a reader who was declined, removed or whose access expired.
When a reader can't get in
A reader whose request was declined, whose access was removed or whose access expired sees why after they verify their email.
- With Request access, they can click Request again, and the request goes back to your admins.
- With Automatic access, a reader whose access expired gets in again by verifying their email. A reader whose access you removed stays out until an admin gives them access again.
Role-based access
With Request access, you can give each reader roles that decide which pages they see. Turn on Enable role-based access in Settings > Access Control, define your roles, and assign them to pages and groups with the access-roles property, as described in Role-based access control.
When you accept a request, tick the roles the reader gets. They see pages open to every reader, plus pages restricted to their roles.
With Automatic access, every verified reader sees all protected pages, and access-roles is ignored.
Sessions
- Readers stay signed in for 14 days, or until their access expires if that comes sooner. After that, they verify their email again.
- Access is checked again every 5 minutes while someone reads, so changes you make under Readers take effect within 5 minutes.
AI tools and embedded docs
- AI Assistant and search work for signed-in readers, with no extra setup.
- Reader MCP Server: Readers connect their MCP client to the
/_mcp/authendpoint and verify their email during the OAuth flow. If you remove their access, the client loses access within 5 minutes. See Reader MCP Server. - Embedded docs: Your server signs users in with reader tokens, and email verification isn't used. See Private Docs.
Example
You publish partner documentation at partners.example.com. Partners don't have accounts in your systems, and you want to approve each company's people yourself. Choose Private mode with Email verification and Request access. When a request arrives, accept it with a 1-month expiry and the partner role, so the reader sees your partner pages but not your internal runbooks.